- en
- es
How to solve a Problem
Log into the ITHelpCenter portal. From the main menu, select Case Management > Console.
In the case grid, select a case and double click on that record or click on the Resolve button.

The case attention window will open:

1. Description and Tools in the case attention Console
 Header Basic case data. Header Basic case data. |
- Case number and assigned priority. 1)
- CAT Date: Creation case date.
- Title: General subject of the case.
- Detail: Description of the case. By placing the mouse pointer near the detail field, buttons will be displayed to open a subwindow with all the content included in the description.
- Current status of the case.
- User. User assigned to the case or the user that created the case.
- Type of advisor attending the case: Handler, Owner, Manager Informed.
User Type
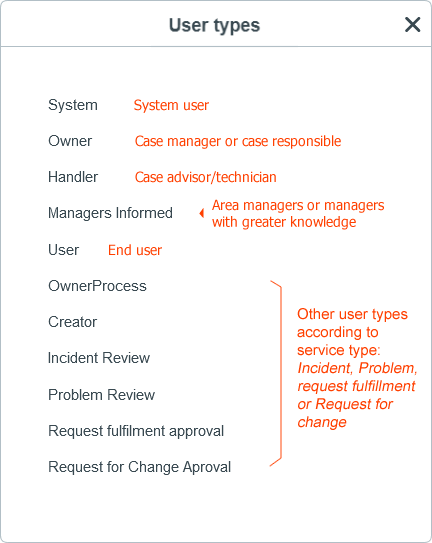
- Case type: Incident, Problem, Request fullfilment, Request for Change .
- Service category.


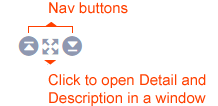
 Case attention tools (Home tab) Case attention tools (Home tab) |
- Maximum remaining time: Remaining and maximum estimated time calculated from the case creation date and maximum case solution time according to SLA/Model and configured schedules.
- Information:
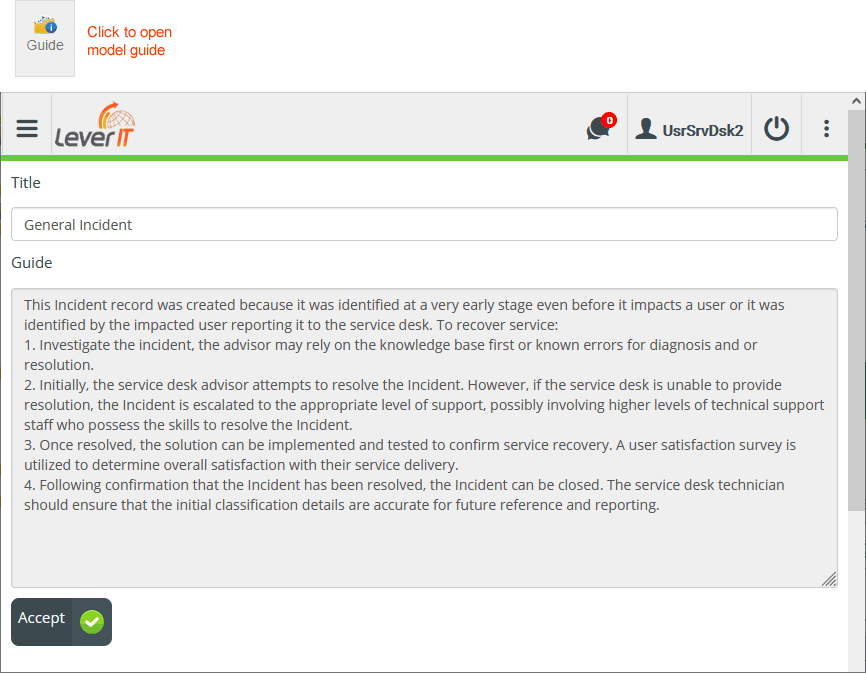
- Guide: Click on Guide button, to display the model guide, click on Accept to return to console view.
- Case: Click on Case button, it will open a window that includes 3 tabs:
General information of the case, users/user type assigned to the case and graphic of the service model/user groups (by type). - Category: Tool to modify the cateogory, SLA (according to category and other criteria), priority, title, description. These changes can be made in the same model or by changing the case model.
See Category tool - Workaround: Tool to show the alternative solution(s) according to the category of the case.
- End User info: User notification(s) method(s).
- Escalation: Tools to escalate the case in a functional or hierarchical way:
- Status: Tool to change the current status of the case.
- Link: Tools to link to the current case: Files, CIs, other cases.


- Attention: In this field enter the actions according to the current step of the case.
- Messages: Allows sending messages to users(end user, owner, manager, etc.) related to the case.
 Service Model Steps Service Model Steps |
Flow of case attention through steps designed in the service model. Besides the case form, additional forms and fields can be configured according to the model type. When enabled, these forms and fields will be displayed after the model steps.
 Adittional forms Adittional forms |
Besides the case form, additional forms and fields can be configured according to the model type. When enabled, these forms and fields will be displayed after the model steps.
 Button(s) to change step and current step help. Button(s) to change step and current step help. |
|
2. Problem source and case detailed data
To display detailed case information click on Case button, it will open a window that includes 3 tabs:
General information of the case, users/user type assigned to the case and graphic of the service model/user groups (by type).

End user info
In the case attention window, clic on  button to display end user name and doble clic on the same button to open the user Notification method window.

3. To start case attention
- At any step during the case cycle it is possible to use the case attention tools.
- Additional forms may exist according to the model configuration. Forms may have mandatory fields that must be completed before changing step.
3.1 Add Actions
In the Attention field enter the actions executed according to the current step. Click on  or ENTER to save.

3.2 Add Messages
Click on the Message button to open the Message window to select the users and type the message to send:

3.3 Attention guide
Click on  to graph the service model steps.

Click on info icon to display service instructions to help solving a case faster, these instructions are defined in the model configuration.

4. Case attention tools
4.1 See case detailed info
- Case Information: Click on Case button, it will open a window that includes 3 tabs:
General information of the case, users/user type assigned to the case and graphic of the service model/user groups (by type). - Workaround: Click on the Workaround button to show the alternative solution(s) according to the category of the case.
- User info: Click on
 button to display end user name and doble clic on the same button to open the user Notification method window.
4.2 How to change case info
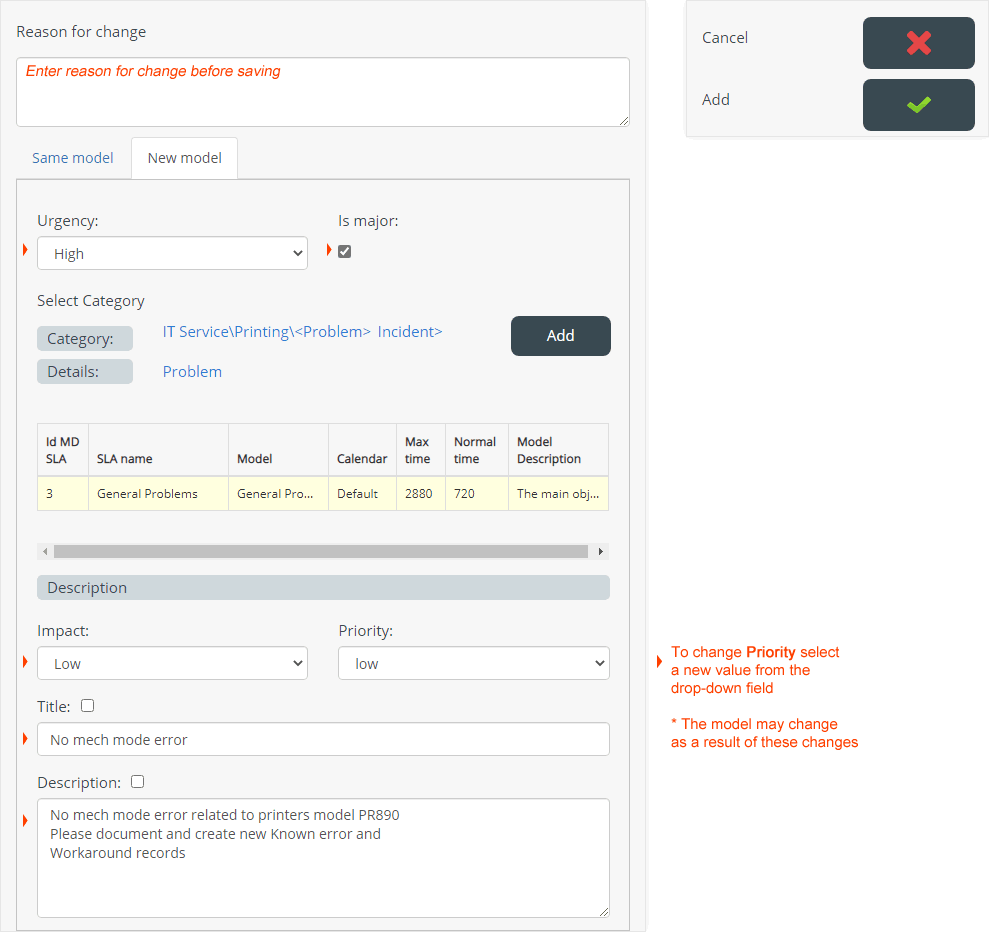
Click on Category button, it will open a window to modify the category, SLA (according to category and other criteria) and model, priority, urgency, title, description, etc. These changes can be made whithout changing the SLA/Model in the Same model tab or by changing the case model in New model tab.
See Category tool
4.2.1 Change category
- Click on the Add button (next to the Category and detail fields) to open the category search window.
- Click on the Select button next to the category that most accurately describes the case reported.
- Once the editing have finished, enter a reason for the change, to save click on the Add button.


4.2.2 Change Priority
- Select the new Priority value from the drop-down field.
- Once the editing have finished, enter a reason for the change, to save click on the Add button.

4.3 Knowledge base usage
Click on the Workaround button to show the alternative solution(s) according to the category of the case.
4.4 How to escalatate a case
Tools to escalate the case in a functional or hierarchical way
- Functional: Click on the Funtional button to open the escalation window
- Hierarchical: Click on the Hierarchical button to open the escalation window
4.5 How to change case status
- Click on the Status button, the window to change the status will open, select the new status in the drop-down field.
- Optional. Enter the cause of the change and click on Change Status button.
4.6 How add/delete CIs to a case
- Click on the CI button to open the CI Affected window.
- To add CIs to the case click Add button, the search window will open.
- Search CIs by criteria such as: CI Name, Brand, CI Type, etc.
- Or select from the complete list of CIs.
4.7 How to add/delete attachments
Single or multiple files can be attached.

4.8 How to link cases
- Click on the Related Cases button to open the window to edit relationships.
- To add one or more related cases, click on the Add button to open the Link case window.
- Select Case to link: Click on
 to open the Advanced search
- Search filtering by case number, category, category name, status, model, SLA, etc.
- Or select a case from the full list.
- After the case selection:
- Category will be autocompleted and fill in the fields:
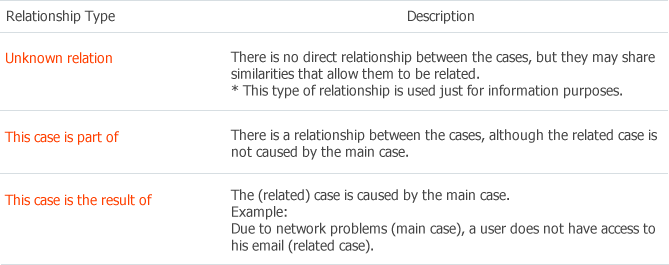
- Relationship type: to define the type of relationship.
- Enter the Title(Subject) and Description of the relationship between cases.


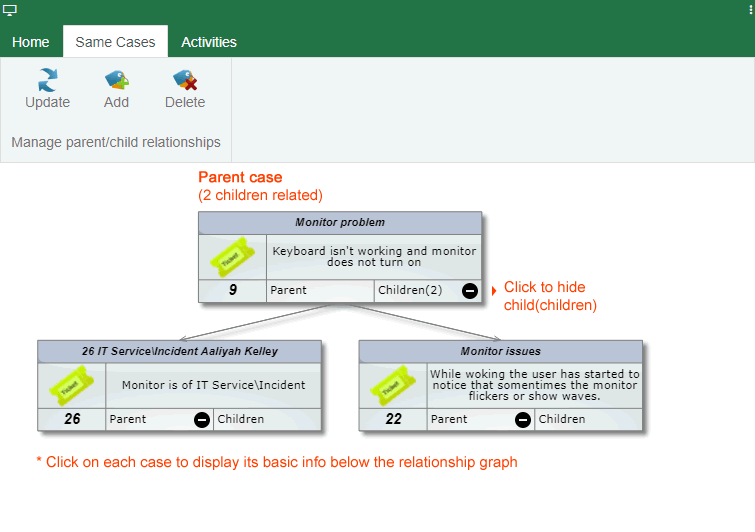
5. Add/Edit parent-child relationships
- In the case attention window go to Same Cases tab.
- Click on the Add button, the window to add parent relationship will open:
Search for a case by criteria such as: Case number, title, description, model, category, etc.
Or select from the complete list of cases (Show all).
Select a record and click on the Use selected record button.
- After adding the relationship, it can be graphed by clicking on the icon

6. Activities
ITHelpCenter is based on activities and service models, in those: steps, working groups, attention time, escalation type, possible results, among others are defined. While a new case is beign created, ITHC automatically decides which model and SLA will be assigned according to defined rules.
In the case attention window go to Activities tab:

7. Change Step
After investigation, diagnosis and other tasks such as creating known error or workaround records for the current step an advisor may change step.
Example
To change from Creation of Known Error and Workaround to Solution Implementation

In this step, the solution can be implemented and must be tested to confirm service recovery. However, if a normal change was required, an associated Request For Change (RFC) will be raised and approved before a resolution is applied to the Problem.
See Create a new RFC record from a problem
Important
- Actions, executed tasks and messages are registered in the action log, see Actions panel.
- When the user determines that the case in resolved, the case new status will be Resolved.
8. Closing case
In this step, the case owner reviews the solution and authorizes case closure.
A case can only be closed when the case is already in the last step of the model, where the Closed option will be available in the status drop-down field.
Optionally enter a closing comment and select from the list a result and cost of the solution.
Finally click on the Change Status button, a message will be displayed indicating if the category, priority, urgency (Is Major) of the case was verified before closing, when the OK button is clicked the status will change to Closed. See Category tool
