- en
- es
How to create a new incident record
- Log into the Atis portal
- In the left pane, click on Manager case > Set Case.
Set Case is where you can review if there's a previous case reporting the same issue or record a new case. Below there's a description for each step of the process, each has it's own fields and purpouse.
1. Search by case or CI and create case
Once you clic on Set Case, a Search screen will open where you can search in the list of recorded cases or by CI.

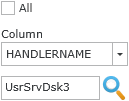 | Click on checkbox to list all recorded cases. Or search by Column and click on  to find coincidences. to find coincidences. |
 | Highlight a record and click on icon to see Owner, User and Handler of the case: Owner: Case owner, first support contact. User: User who reported the issue. Handler: Functional, adviser. |
 | Highlight a record and click on icon to review the case record. |
 | Click on checkbox to activate data import from an existing case. See: How to create a new incident case based upon a previous one |
If you didn't find a previous case reporting the same issue, click on
 to create a new case1)
 New incident case form</wrap>

2. Select User and notice method

Click on to search in the user's list, you can view all available users or search for an specific user.

- Choose a prefered way of notice in the Method of notice dropdown list:

Once you've chosen the notice method, click on . A popup screen allows you to edit contact details:
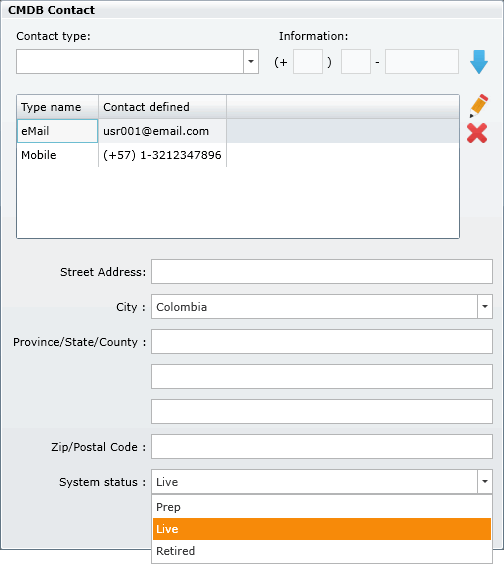
Contact type Select the notice type (mobile, phone, email) Information Type according to notice type: mobile/phone/email and click  to add.
Address Other contact details like Address, country, county/state and zipcode System status Select system status:
Prep: Pending for aprobation
Live: Active
Retired: Outdated info


3. Set case details
In this part of the form the administrator can include: description and title, category, urgency, impact and priority of the case:
| Description | Description of the reported issue. Relevant information to include in this field: frequency of occurrence of the issue, event that triggers the issue, consequences of the event, etc.  |
| Title |  |
| Category | This screen allows you to categorize the case, search the category that best describes the issue. Once you choose the category, the system will find related Workarounds and automatically sets Models and SLAs that address the reported issue and helps to resolve the case faster. Click on icon  to open the search category screen. Search by category or coincidence: to open the search category screen. Search by category or coincidence:   Click on  to search for workaround records. to search for workaround records.  See: Create a new Knownerror Create a new Workaround |
| Urgency Impact Priority | These fields indicate how critical this case is for your company and how affects operation. Urgency is how soon the issue must be fixed so it wont affect normal company operations.  Impact is how big the effects of the reported issue will be. Impact is automatically filled when the SLA is set.  Priority is calculated based upon urgency and impact. Select Urgency and Impact and Priority will be calculated  |
| Is Major | Click on checkbox to indicate if the problem is important.  |
4. Add Attachment
Here you can add relevant attachments to an incident:

| Add File | To add attachments to the case, clic on  a popup screen allows you to browse your computer for the files to attach. You can include a description for each attached file. a popup screen allows you to browse your computer for the files to attach. You can include a description for each attached file.  Click on  to find the file, add description2) and click on to find the file, add description2) and click on  to save. to save. |
| Edit description | Select the attachment and click on  to edit file description and click on to save. to edit file description and click on to save.  |
| Delete File | Select attachment and click on  |
| Download File | Select attachment and click on  |
5. Add CI
Here you can relate CIs to an incident:

| Add CI | To add affected CIs to an incident, click on  a popup screen allows you to browse for CIs. a popup screen allows you to browse for CIs. View all or search for a specific CI. Filter by column, drag a column header to group  Select a CI and click on  to add. to add. |
| Edit CI description | Select CI and click on  to edit description and click on to save. to edit description and click on to save.  |
| Delete CI | Select CI and click on  |
| View CI | Select CI and click on  A popup screen allows you to view information and relations of the CI See: How to view CI Information and relations |
6. Create incident
If you've done setting the incident information:

| Create case | Click on  to create the incident record. to create the incident record. The new record is created and the system will assign an unique case ID: 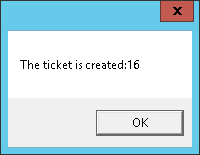 |
| Cancel case | Click on  to cancel to cancel |
| Quit case | Click on  to quit to quit |
| Minimize form | Click on  When the form window is minimized, the icon  with the case number will show in the top left corner of the main window, click on icon to restore the form. with the case number will show in the top left corner of the main window, click on icon to restore the form. |
| Quick creation menu | Click on  to open Case template window,
you can choose an existing case template for quick creation of a new case. to open Case template window,
you can choose an existing case template for quick creation of a new case.See Quick ways to create a new incident record |